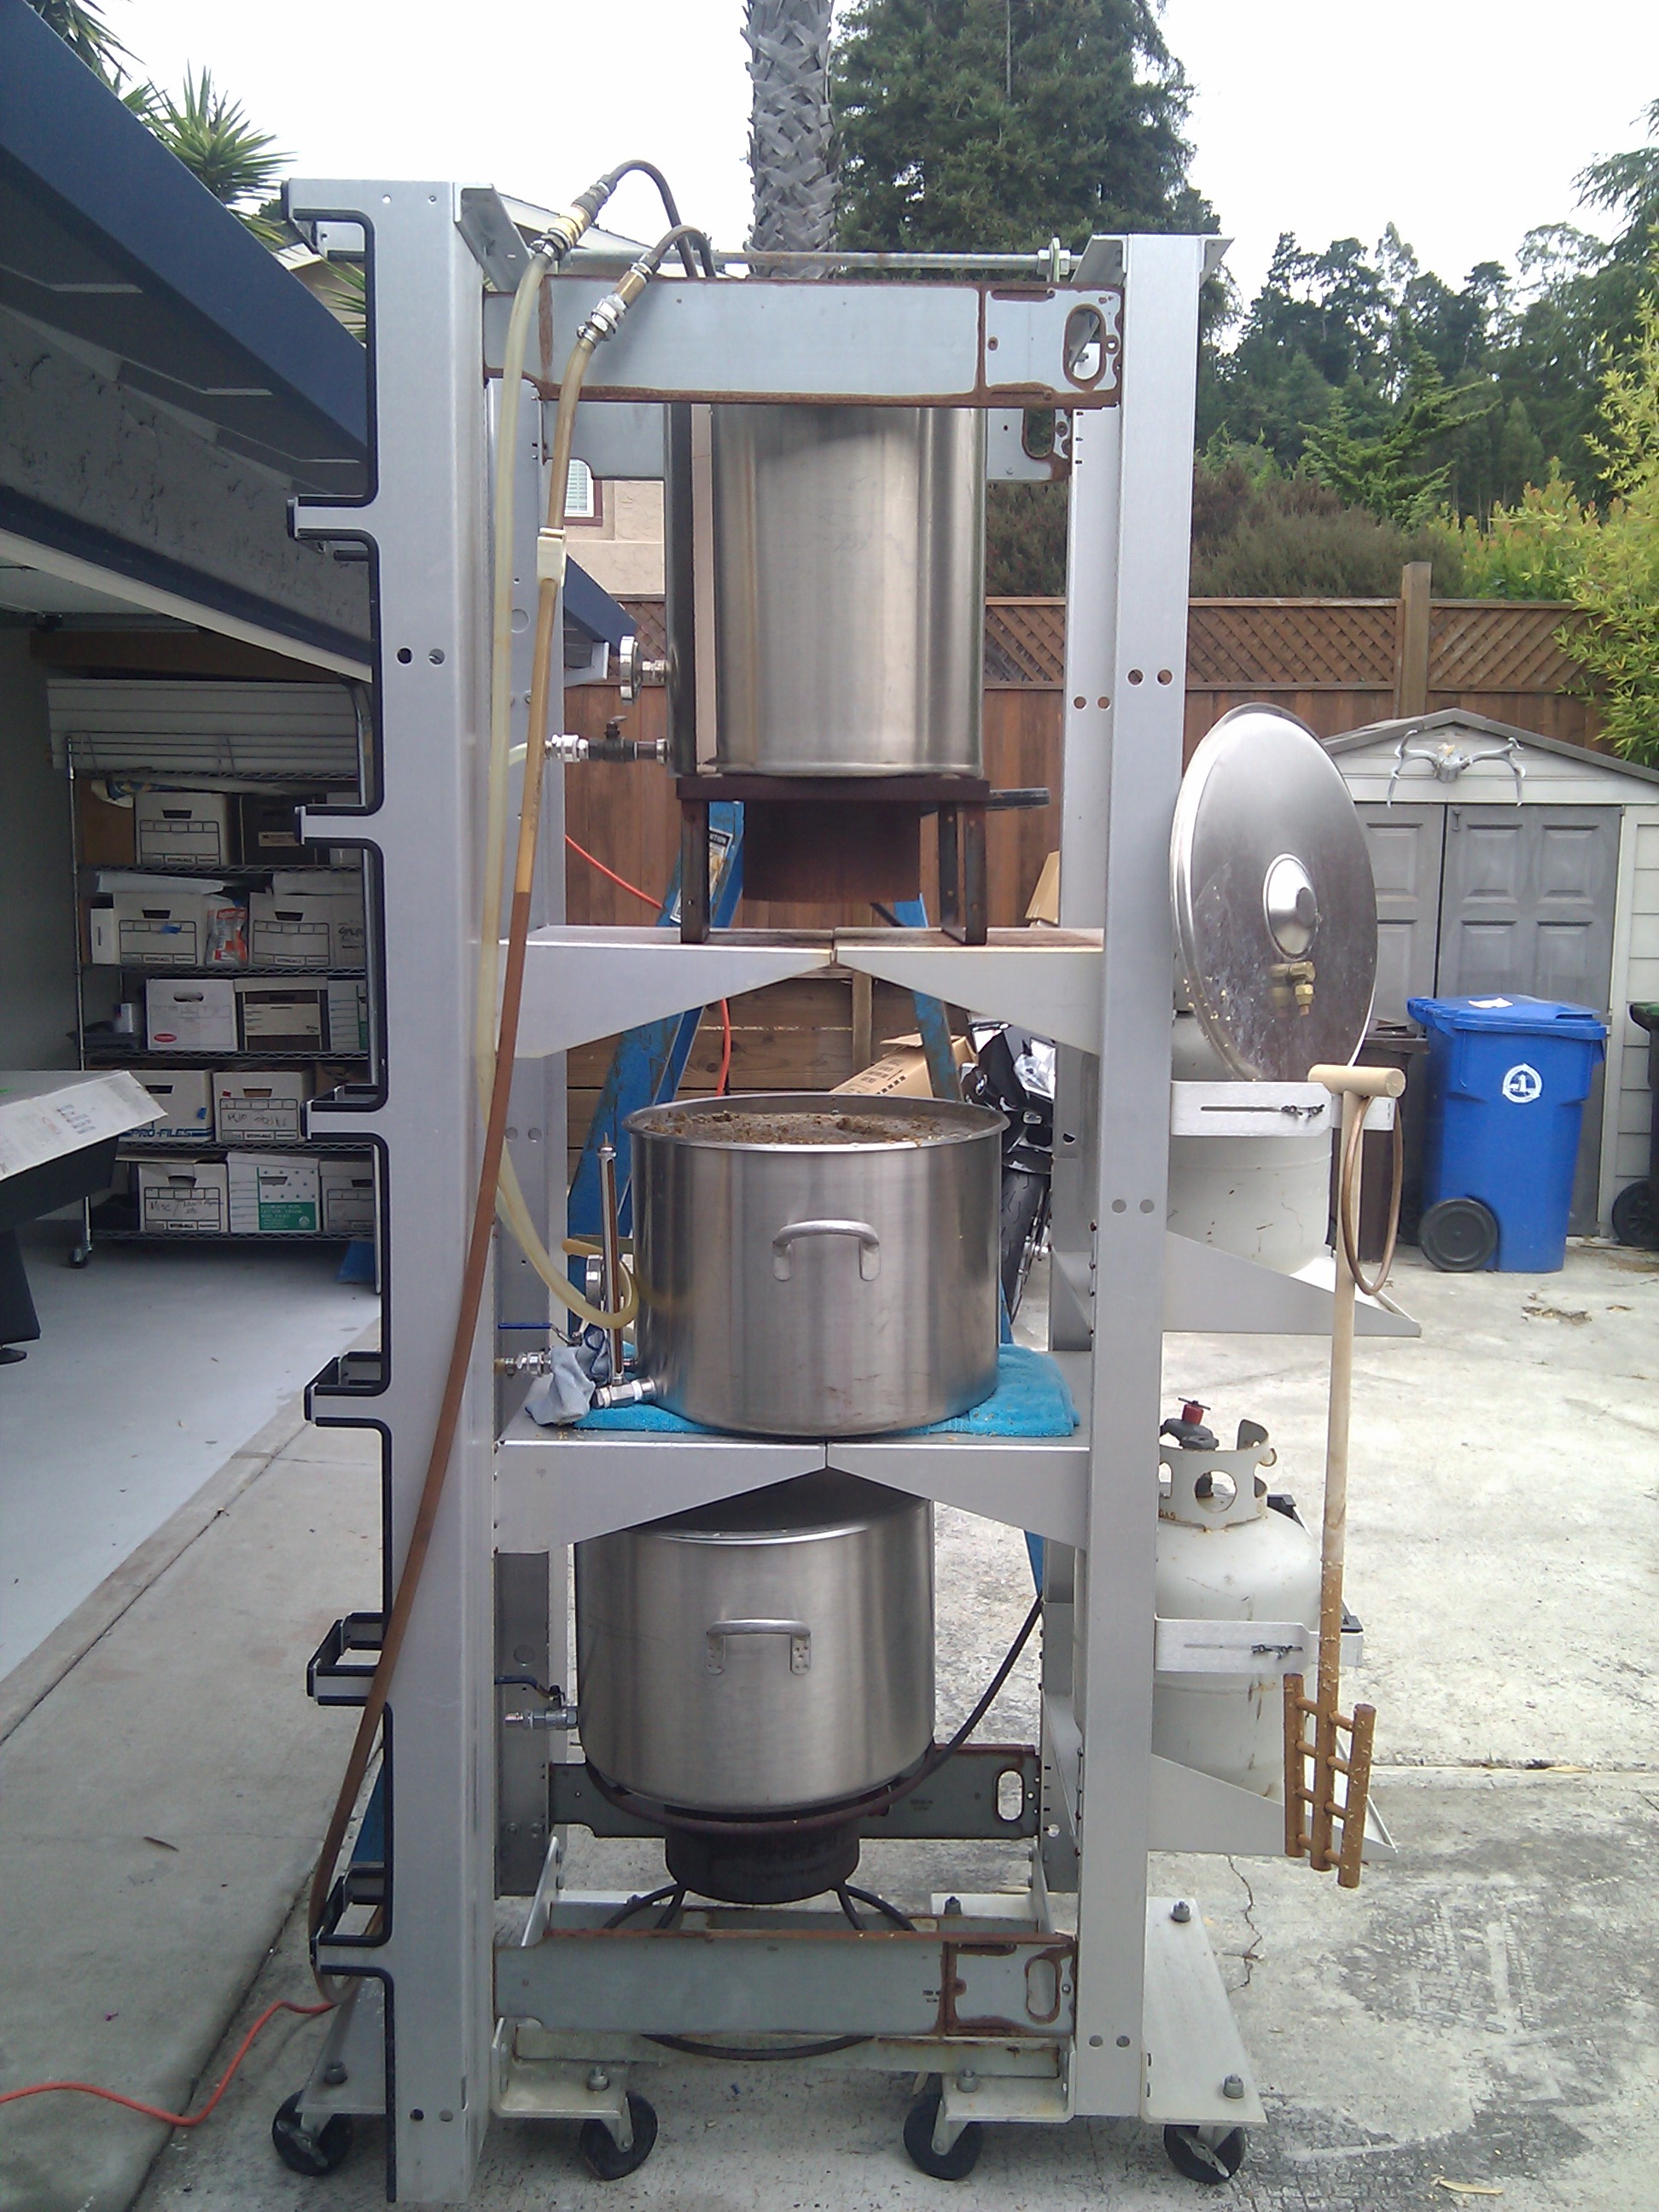
 A pair of 19″ Chatsworth racks are connected via two 3/4″ grade-8 steel threaded rods at the top and bottom. This cinches the shelving together so much of the downward force becomes outward force back to the rails, allowing considerably more than the rated 50lb weight. UPS rails at top and bottom provide some shear strength to keep the whole thing square. I use the cable management rails for running hoses and cords (one side being “wet”, other being “hot”), and as a mount point of sorts for the pump. Heavy-duty castors help it move around, and pulling the kettles and pump off strips it down to the point it can be pressure-washed. I built this in 2003 out of random defunct ISP flotsam in my garage (with a trip to the hardware store for the grade-8 steel rods, so, for the rack setup itself, my total cost was about $40); as of 7/4/2011 it has supplied ~700gal in 10gal batches, and I haven’t had to turn a screw on it since assembly.

Top kettle starts out as sparge water (note lines running up to an immersion chiller that is initially used to raise wort temp for step mashing without heating the grain directly). Middle kettle is the mash tun, and lower kettle is the first boiler. This lower boiler allows me to start the boil almost immediately after starting the sparge, which shaves about an hour of thumb twiddling out of the process. A magnetic drive pump (out of view in these pics, on the lower left front cable management rail) is initially used for recirculation in step mashing, and then becomes the method of moving the wort from the lower boiler to the upper (once sparge water is exhausted). I typically will split the wort between upper and lower for the majority of the boil; this gives me plenty of headspace for foam and allows me to get just over 100kBTU under the wort for reaching the boil quickly and getting good reduction. Toward the end of the boil, I’ll run the remaining wort from the lower to the upper kettle, allowing me to gravity feed the whole batch into a plastic conical fermenter. The immersion chiller is used for its originally intended purpose immediately at flame-out, so my finishing hops don’t inadvertently become flavor hops in the 20min or so it takes to rack into the conical.
I supplement cooling with a counterflow chiller, which takes the wort the rest of the way to 70F with the valve wide open; this allows me to pitch within 1/2hr of flame-out, giving my chosen bug a decisive advantage over any encroaching microbes. I typically pitch from a starter prepped the day before (as close to high krausen as I can get it), so I have stupidly high pitching rates and high activity levels, which also helps the chosen bug get an early sprint (typically have raging fermentations within 12hrs).
Most three-tiered homebrew rigs are quite expensive. The RalphRack ™ brew setup is probably cheaper than most of those even if you bought all the parts new from Graybar, but is really ideal for someone on a budget who happens to have access to used or discarded telecom/datacenter gear like this.
Very nice set up. At the moment, my mash tun is being used at our restaurant for making stocks – can’t wait to fill it with a grain bill again.
Wow… very cool. Wish there was a “do it yourself” kit.